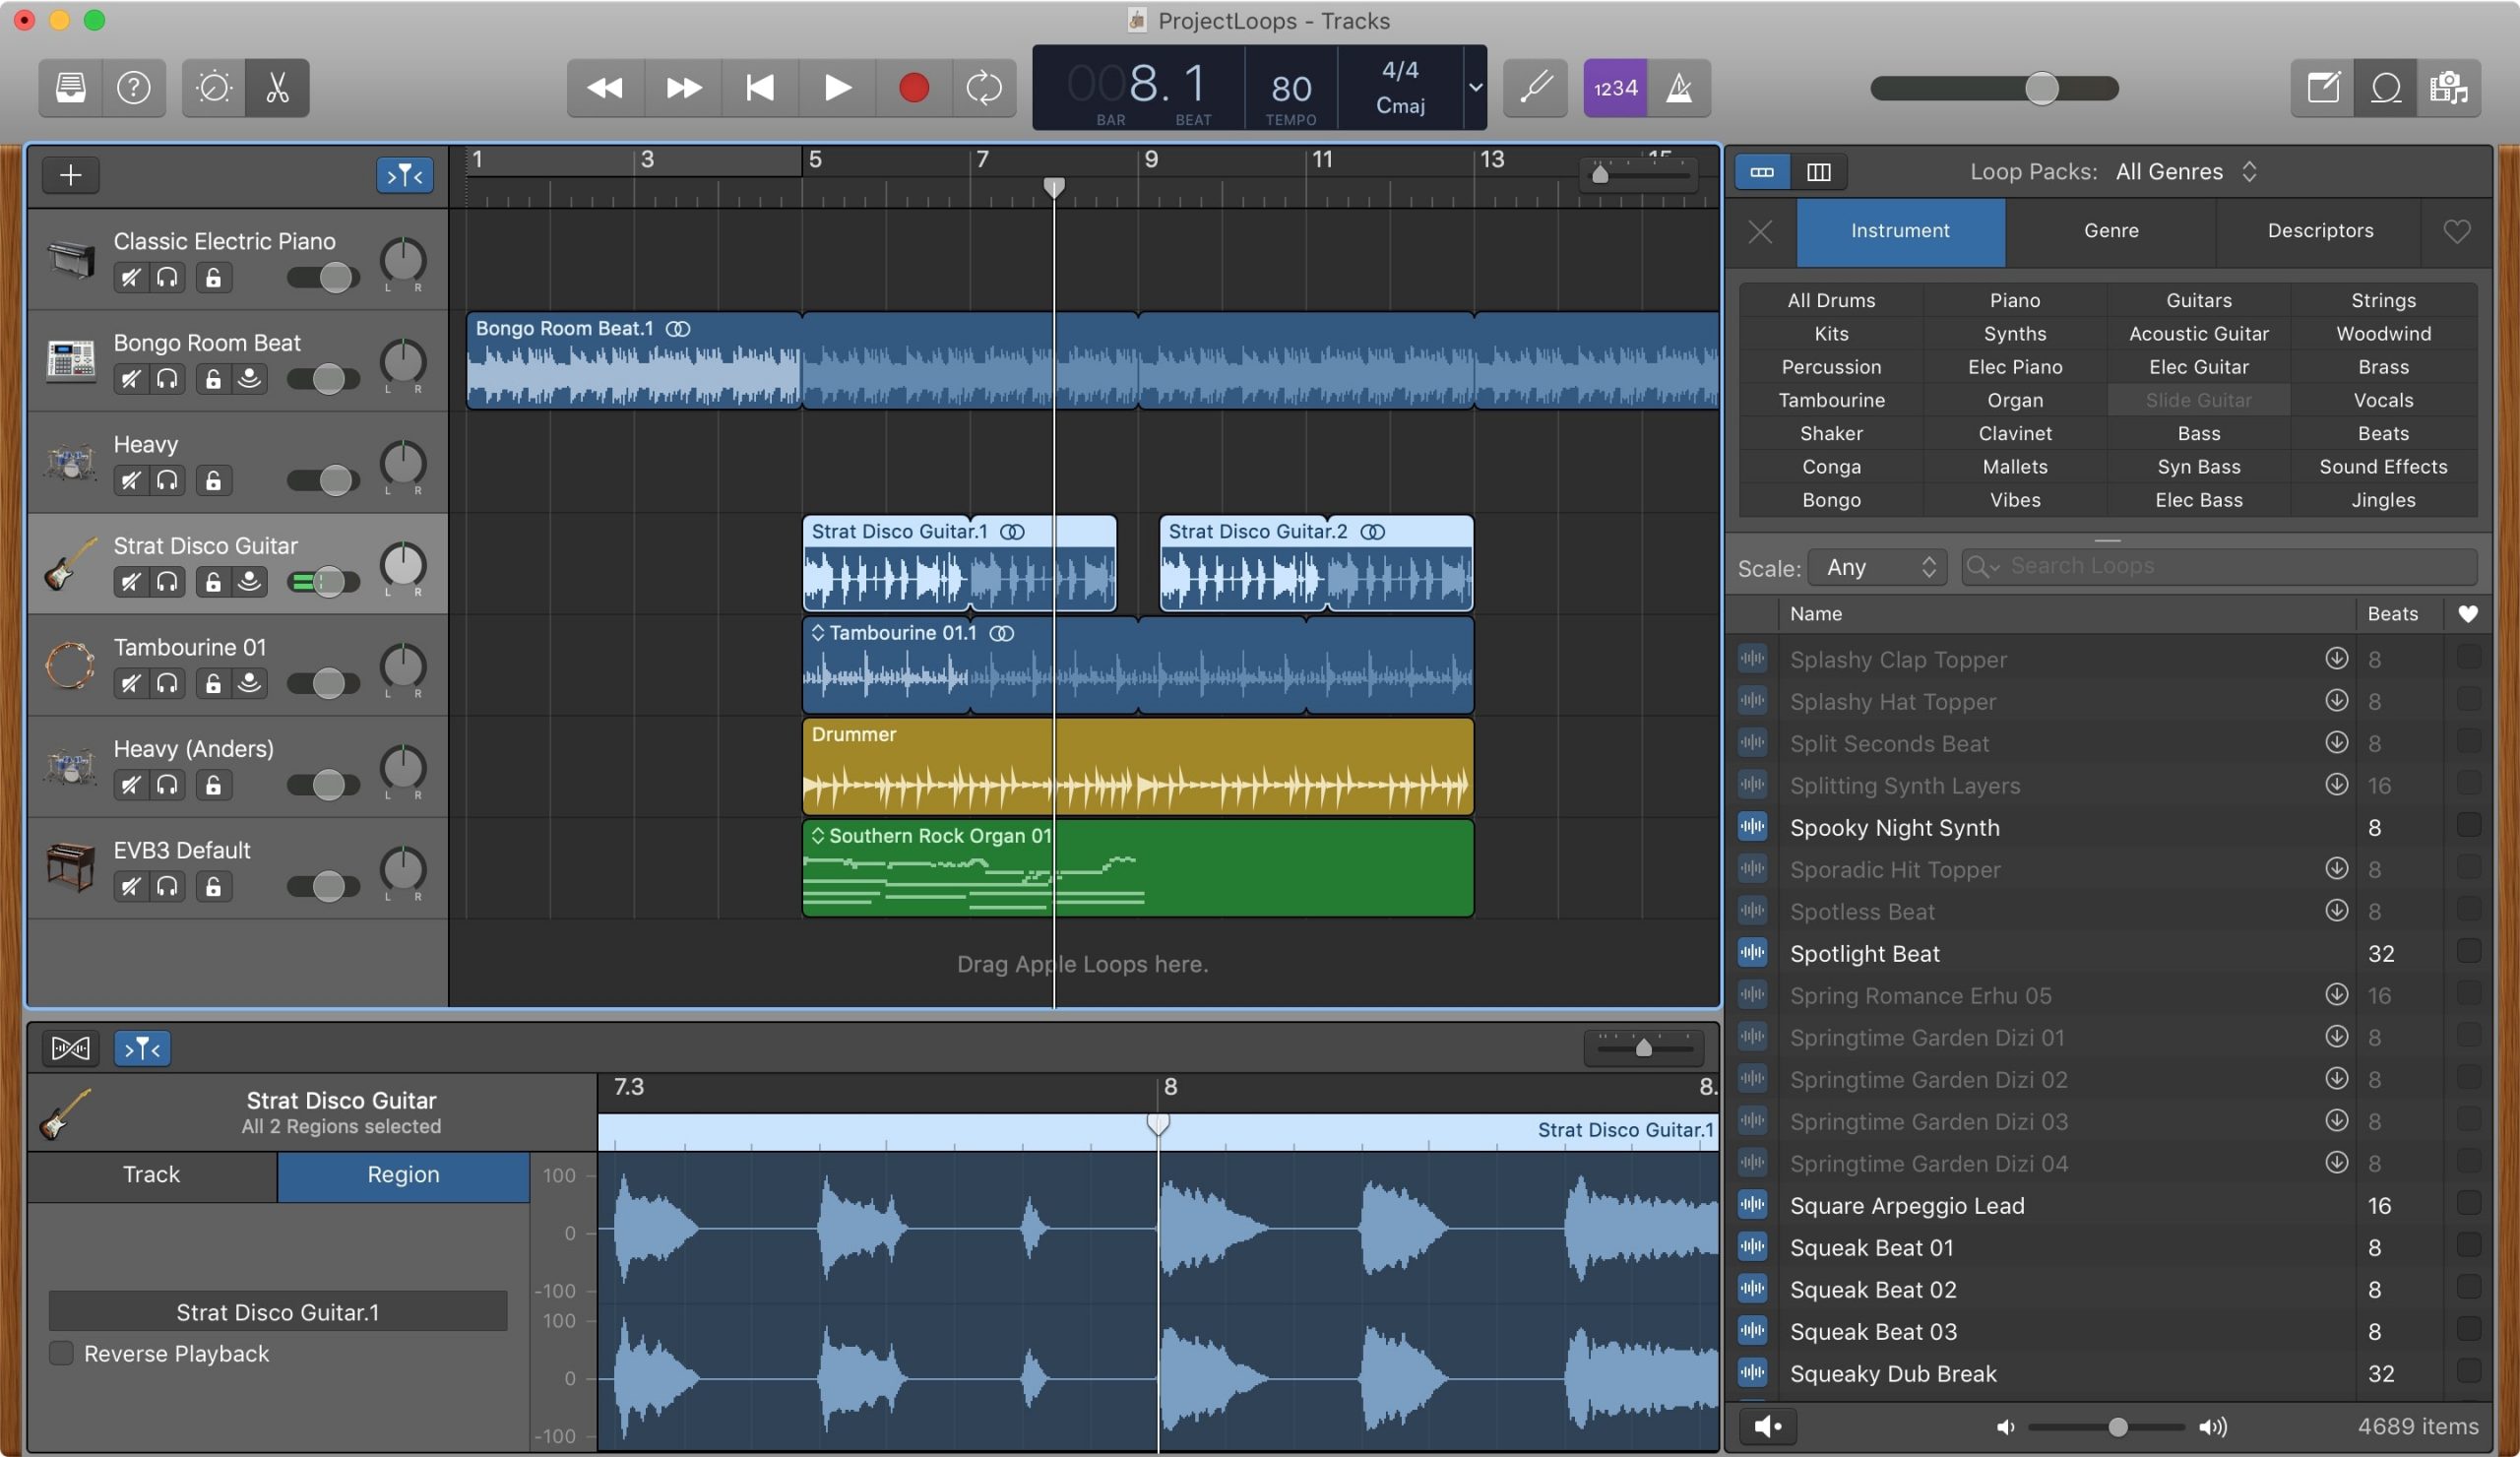
Today, we are going to learn, how to download Garageband for windows Pc. But first, get to know what is Garageband. Garageband is a well-known Digital Audio Workstation (DAW) developed by Apple. It’s available for download on Mac OS and iOS devices for absolutely free. Garageband offers a wide selection of instruments, sounds, and effects to choose from.
It has an extremely easy-to-use interface making it suitable for beginner composers. However, that doesn’t limit its capability to produce professional music. It provides MIDI keyboard supports and multiple tracks making it a well-rounded workstation. Here are some of the amazing features that Garageband has to offer:
Features Of Garageband:-
- Allows support for USB keyboards.
- VST (Virtual Studio Technology).
- Transform pad that allows you to morph output of synths.
- Cross Compatibility and wireless connectivity to other Apple devices.
- Easy to use and organized user interface.
Now, here you are trying to download this amazing software for Windows. That sad truth is you really can’t. Well, there’s one method but you won’t technically be running it directly from Windows.
You’ll be running it on a virtual Mac OS that is running inside of Windows (basically the plot of Inception for operating systems). Confused? Well don’t be, we’re going to guide you through the only way to get Garageband working on your PC. Please note, this process is time-consuming and a little complex.
Contents
What is VirtualBox?
I mentioned we can run Garageband on Windows by virtually running Mac OS on your PC. We’ll be doing that by using software known as VirtualBox. Essentially, VirtualBox allows you to run another operating system inside of Windows such as Linux or Mac OS.
It’s a great tool for testing out operating systems before you permanently install them onto your hard disk. You can also use it for reasons such as running Garageband or any Mac OS apps on Windows. 
Before we begin, you have to understand that VirtualBox takes up a lot of memory. I mean, you’re basically running an entire operating system from your desktop. Hence, make sure you meet at least the minimum system requirements listed below.
GarageBand on PC- Minimum System Requirments:
- Memory: At least 4GB RAM (We recommend upwards of 8GB RAM). Mac OS is a high-performance and complicated system, hence it will take up a lot of memory.
- Hard Disk Space: At least 12GB of free space.
- Windows XP or later installed on your device
- Any recent Intel or AMD processor should do the trick.
How To Get Garageband Working On Windows PC?
Now that we’ve explained how we’re going to get Garageband working on a Windows computer, let’s show you how to actually do it. If you have a bootable copy of Mac OS (you probably won’t) lying around this process will become about 10 times easier. If you don’t you’ll need a friend’s Mac laptop and follow the instructions below.
Step 1: Creating Bootable Copy Of Mac OS Catalina
We’ll be running Mac OS Catalina in our Virtual Box. If you have a bootable ISOcopy of Mac OS Catalina you can copy it to a USB and skip this step. If you don’t, grab your friend’s Mac Book, and let’s get started.
- Open the App Store on the Mac Book.
- Search for macOS Catalina and select download.
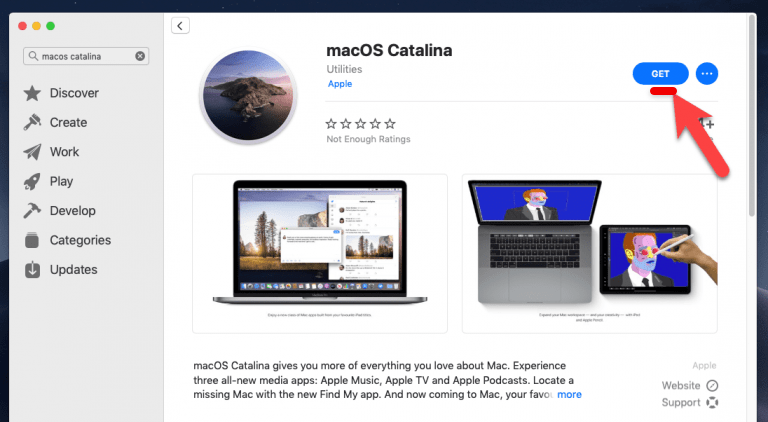
- Once, that’s done downloading. Open ‘Terminal’ and enter the following commands one by one:
1. hdiutil create -o /tmp/Catalina -size 8500m -volname Catalina -layout SPUD -fs HFS+J
2. hdiutil attach /tmp/Catalina.dmg -noverify -mountpoint /Volumes/Catalina
3. sudo /Applications/Install\ macOS\ Catalina.app/Contents/Resources/createinstallmedia --volume /Volumes/Catalina --nointeraction
4. hdiutil detach /volumes/Install\ macOS\ Catalina
5. hdiutil convert /tmp/Catalina.dmg -format UDTO -o ~/Desktop/Catalina.cdr
6. mv ~/Desktop/Catalina.cdr ~/Desktop/Catalina.iso
What these commands did was create a disk image of the Catalina OS you just downloaded and then converted it to an ISO file and lastly moved it to the desktop. Before proceeding, copy the created file onto a USB for use in the next step.
Step 2: Setting Up Mac OS Catalina On Virtual Box
After step 1, you’ll no longer need the Mac Book, we’ll be doing the rest of the setup on Windows. We’re about halfway there to getting Garageband working on your PC.
In this step, we need to download and install VirtualBox as well as change some configurations in the VirtualBox settings so that Mac OS Catalina will run smoothly. Before you begin, copy the bootable file you just created onto your PC using a USB.
- Download and install VirtualBox on your Windows PC.
- Open VirtualBox and click New to create a new virtual machine.
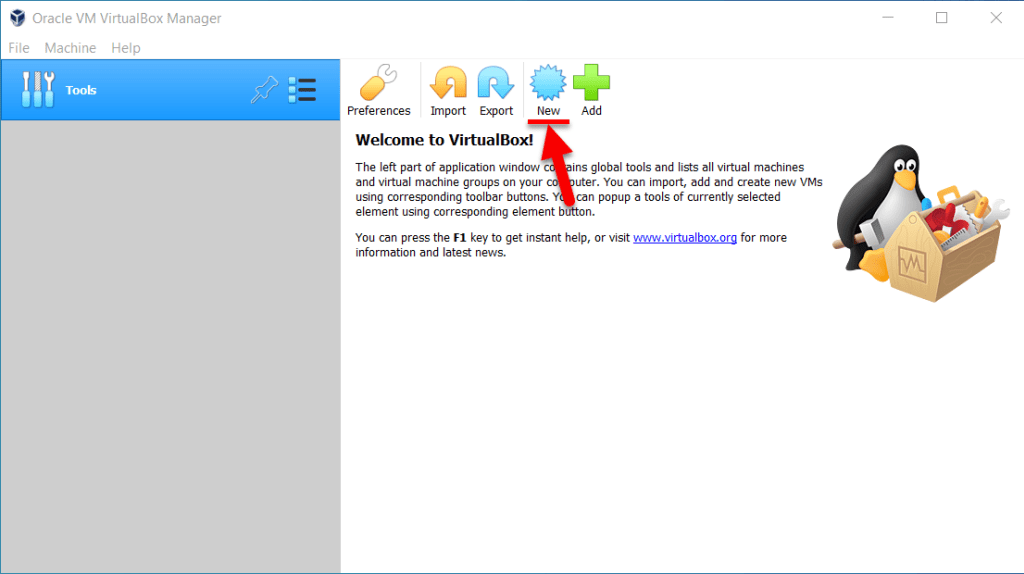
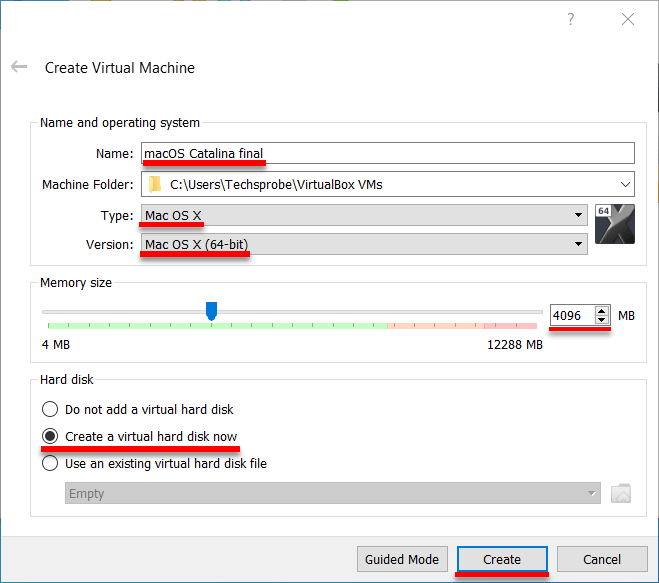
- When the pop-up appears, click ‘Expert Mode‘ on the bottom and enter the details as follows. You can choose the name as follows, however, this must be the name that you use in the upcoming steps. Change the memory size to at least 4096MB, if not higher.
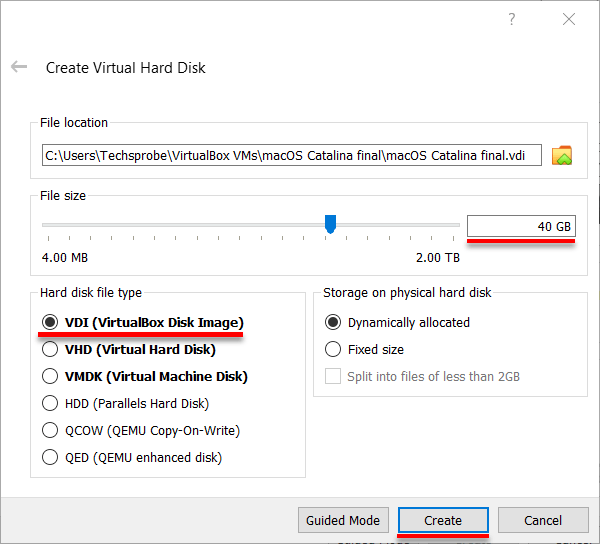
- Select VDI as the Hard disk file type and click create.
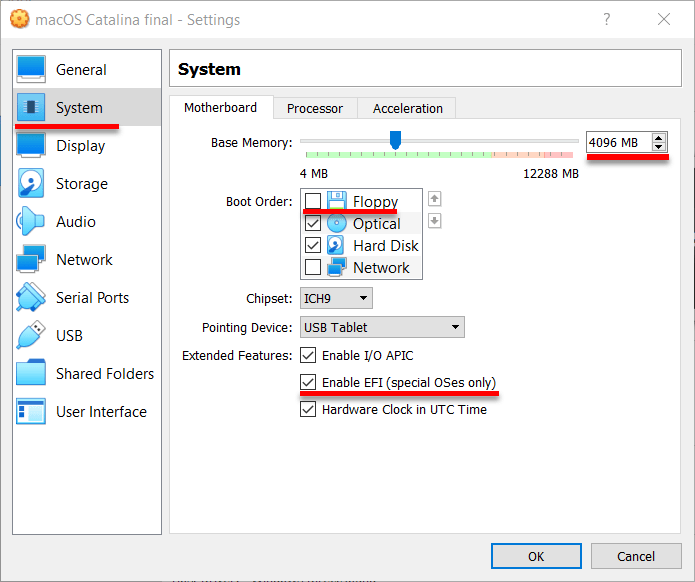
- Now ‘macOS Catalina final‘ virtual machine should appear in the sidebar of VirtualBox. Now click on the Settings icon. In the System tab uncheck ‘Floppy‘, and check ‘Enable EFI’.
- In the Processor tab within the ‘System’ section. Increase your processor up to 4.
- In the Display Section, ‘Screen’ tab, increase video memory up to maximum.
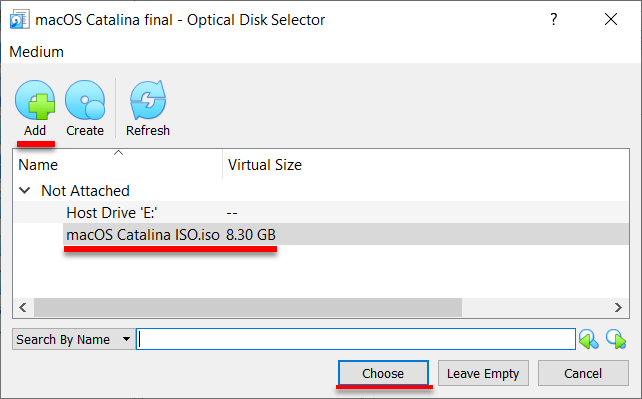
- In the Storage section, select ‘Empty’, click the CD icon next to Optical Drive and select ‘Choose/Create a virtual Optical Disk. Now press ‘Add’ and select the bootable mac OS Catalina ISO file you just copied to your PC.
- Now lastly, enter the following commands into Window’s Command Prompt and click Start on Virtual Box. You will now be guided through the setup process for Mac OS.
1. cd "C:\Program Files\Oracle\VirtualBox\"
2. VBoxManage.exe modifyvm "Virtual Machine Name" --cpuidset 00000001 000106e5 00100800 0098e3fd bfebfbff
3. VBoxManage setextradata "Your VM Name" "VBoxInternal/Devices/efi/0/Config/DmiSystemProduct" "iMac11,3
4. VBoxManage setextradata "Your VM Name" "VBoxInternal/Devices/efi/0/Config/DmiSystemVersion" "1.0"
5. VBoxManage setextradata "Your VM Name" "VBoxInternal/Devices/efi/0/Config/DmiBoardProduct" "Iloveapple"
6. VBoxManage setextradata "Your VM Name" "VBoxInternal/Devices/smc/0/Config/DeviceKey" "ourhardworkbythesewordsguardedpleasedontsteal(c)AppleComputerInc"
7. VBoxManage setextradata "Your VM Name" "VBoxInternal/Devices/smc/0/Config/GetKeyFromRealSMC" 1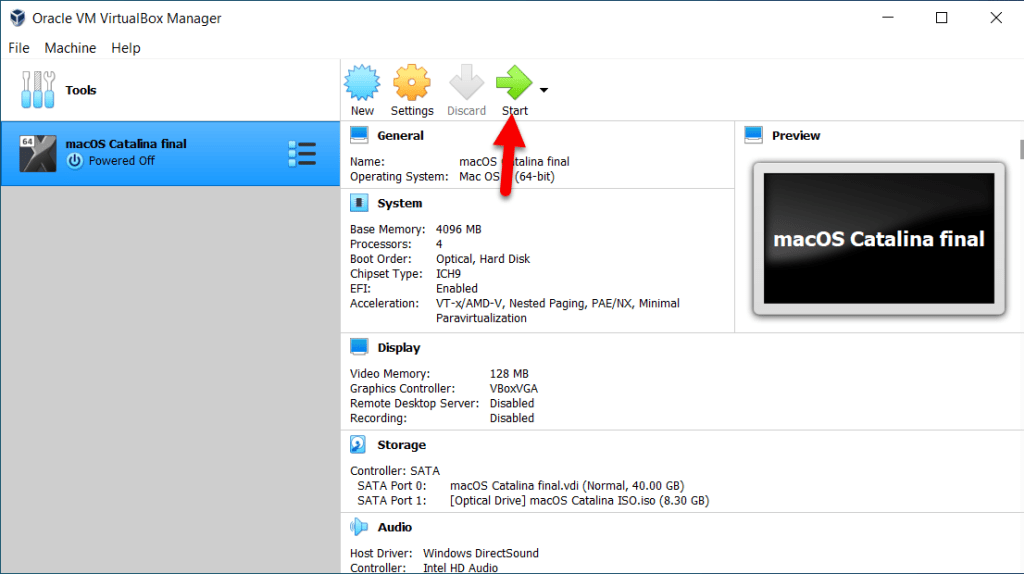
Step 3: Downloading and Installing Garageband
If you made it this far, you definitely want to get Garageband running on your PC. We’re almost there. We left off in the setup process for Mac OS on your virtual machine.
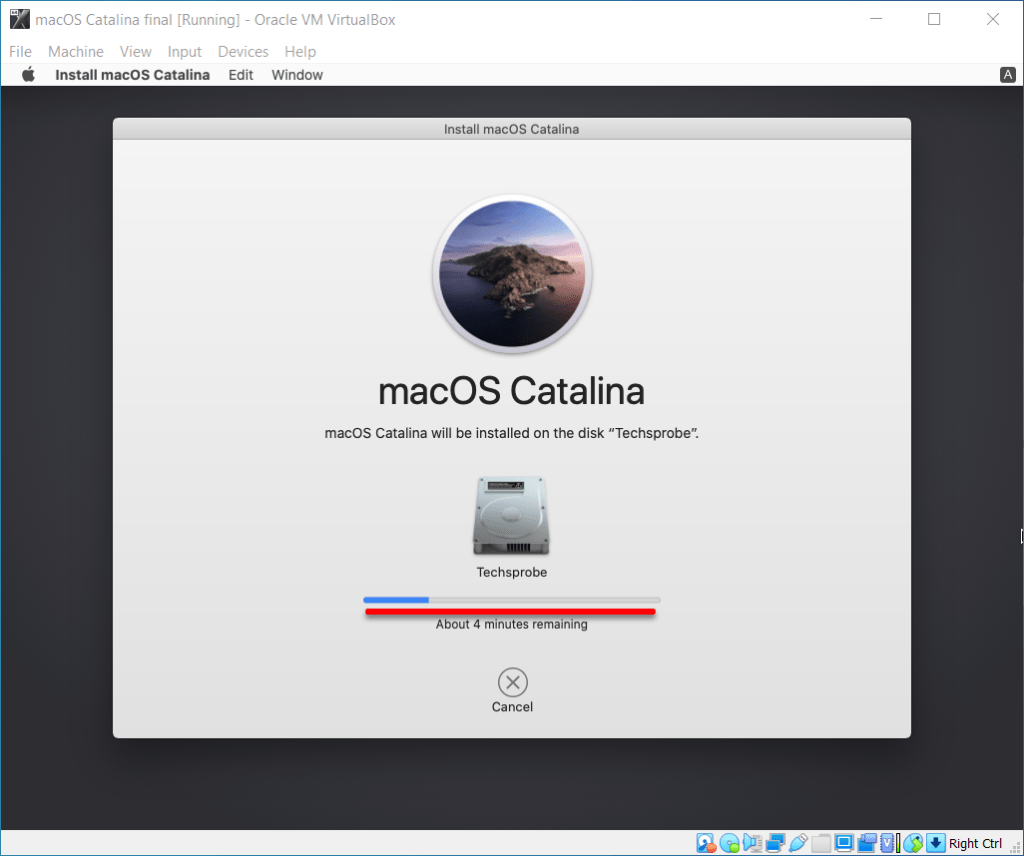
- Run through the Mac OS setup pages so that it begins installing.
- Set up your account and click on the App Store on your desktop dock, search for Garageband and install. Or you download Garageband from Apple’s website.
- Run and enjoy Garageband on your Windows computer!
Final Words
Downloading Garageband for Windows is no easy process. However, if you really want to get it running on your Windows computer, this is the only way to do it. Moreover, stay away from websites that states it has a working version of Garageband that will run on Windows.
In most cases, these files will not be the official Garageband and it may also install adware or even malware on to your Windows computer. If you have any questions or doubts about the installation process, please leave them in the comments below. Cheers!